Darksider's Realm

(this is not a place for lazy video game freaks. We Darksiders have been around doing our thing for decades before the mindless couch blobs latched onto the term Darksider)


DARKSIDER In the world of automotive hobbyists a Darksider is one who modifies and or customizes any and all sorts of vehicles. The Darksiders are in a class of their own simply because they endeavor to be different and do things that others would not attempt for a number of reasons mostly being related to a lack of ability and fear of non conformity.

This is a forum for people who think outside the box in everything they do. It doesn’t matter if you are modifying or building from scratch. It doesn’t matter what brand or brands of vehicles or components you are using. It doesn’t matter if you are working on a mini car or a bus.

We will not be asking you for donations or any kind of monetary payments. We will be asking for help in terms moderators and encouraging you to spread the word and add to our membership.


Join the forum, it's quick and easy

Darksider's Realm

(this is not a place for lazy video game freaks. We Darksiders have been around doing our thing for decades before the mindless couch blobs latched onto the term Darksider)


DARKSIDER In the world of automotive hobbyists a Darksider is one who modifies and or customizes any and all sorts of vehicles. The Darksiders are in a class of their own simply because they endeavor to be different and do things that others would not attempt for a number of reasons mostly being related to a lack of ability and fear of non conformity.

This is a forum for people who think outside the box in everything they do. It doesn’t matter if you are modifying or building from scratch. It doesn’t matter what brand or brands of vehicles or components you are using. It doesn’t matter if you are working on a mini car or a bus.

We will not be asking you for donations or any kind of monetary payments. We will be asking for help in terms moderators and encouraging you to spread the word and add to our membership.

Darksider's Realm

Would you like to react to this message? Create an account in a few clicks or log in to continue.
Darksider's Realm

A message board & forum for automotive builders, fabricators and customizers who think outside the box.


+4
Duke55
58 ford
wmjoe1953
Darkside Dave
8 posters

    Another COE project...

    Darkside Dave
    Darkside Dave
    Admin


    Posts : 1018
    Join date : 2009-04-21
    Age : 79
    Location : Marietta, Ohio

    Another COE project... - Page 2 Empty Considering the possibilities???

    Post  Darkside Dave Mon Feb 06, 2012 2:29 pm


    Hi folks,
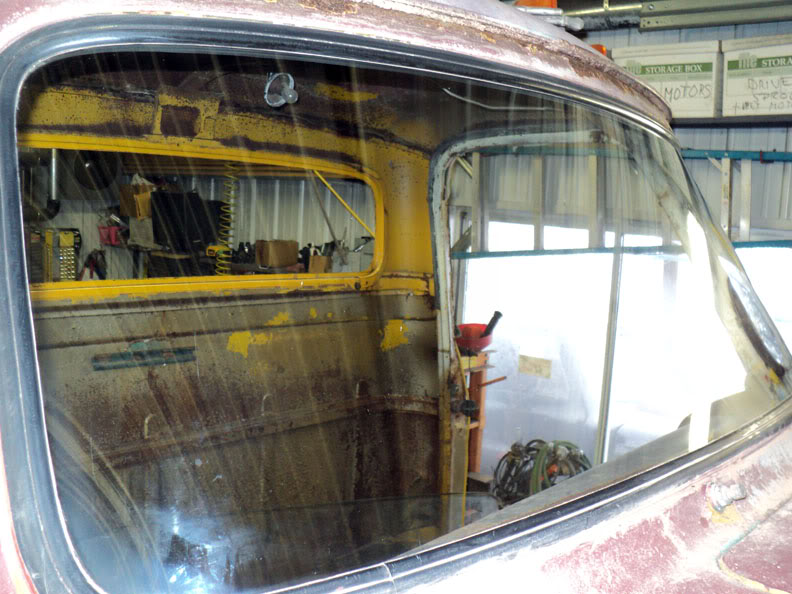
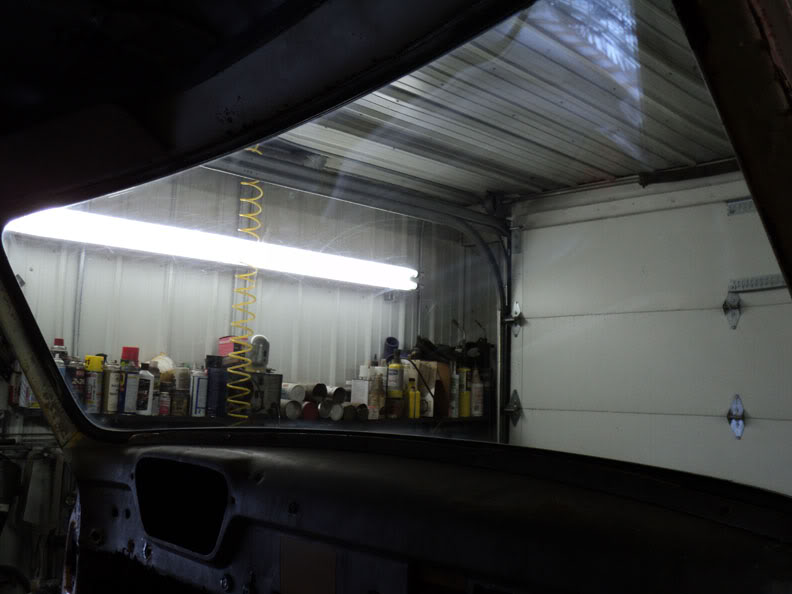
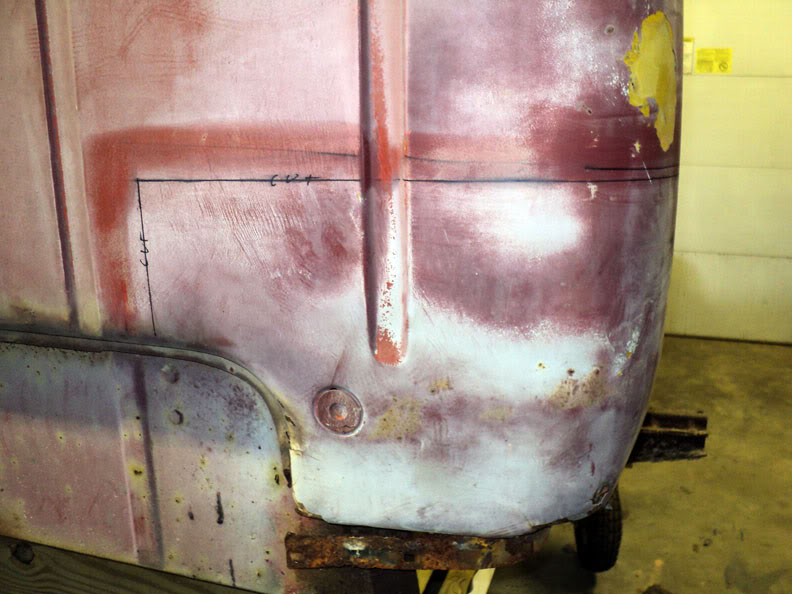
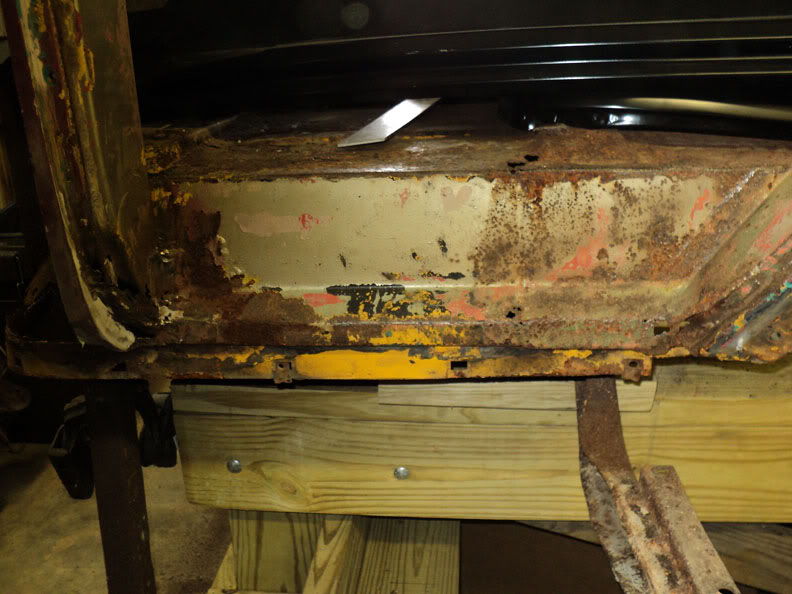
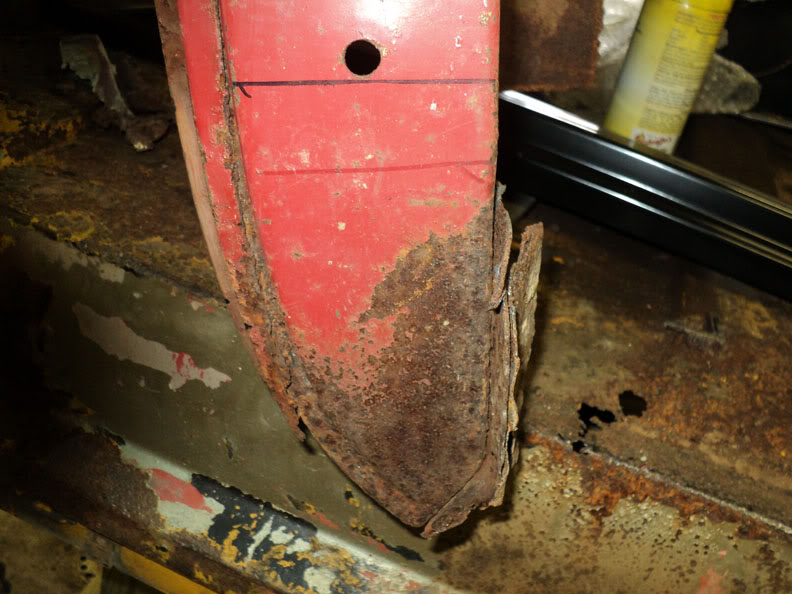
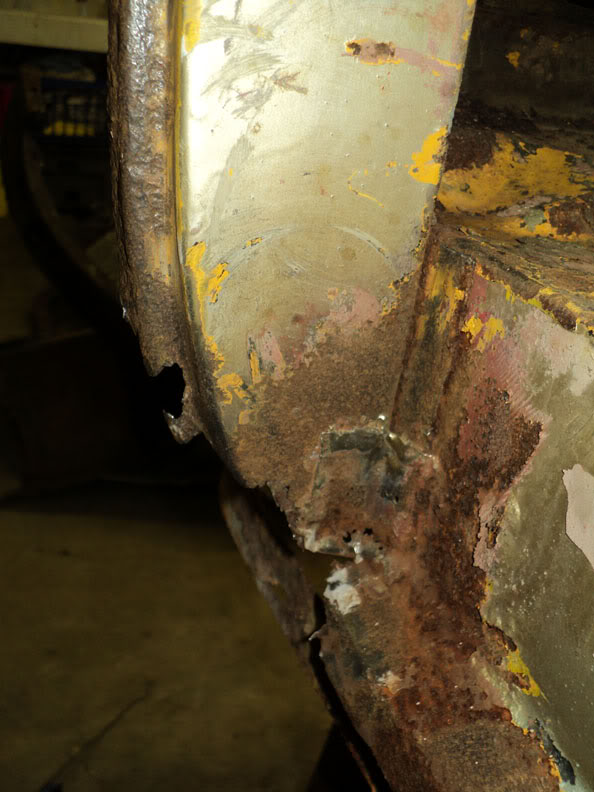
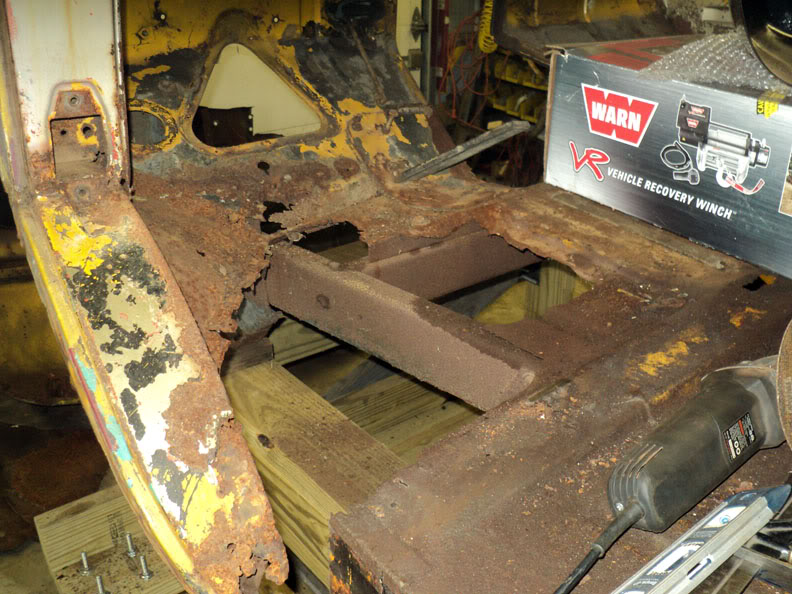
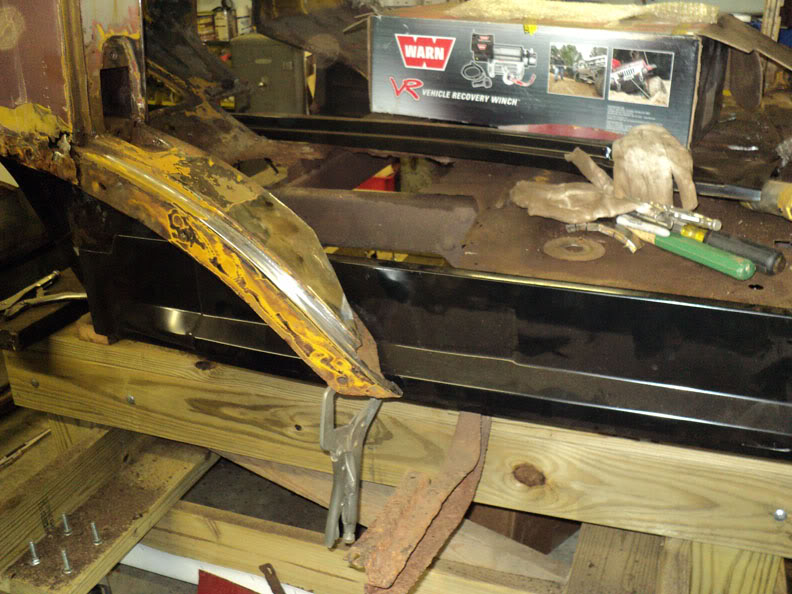
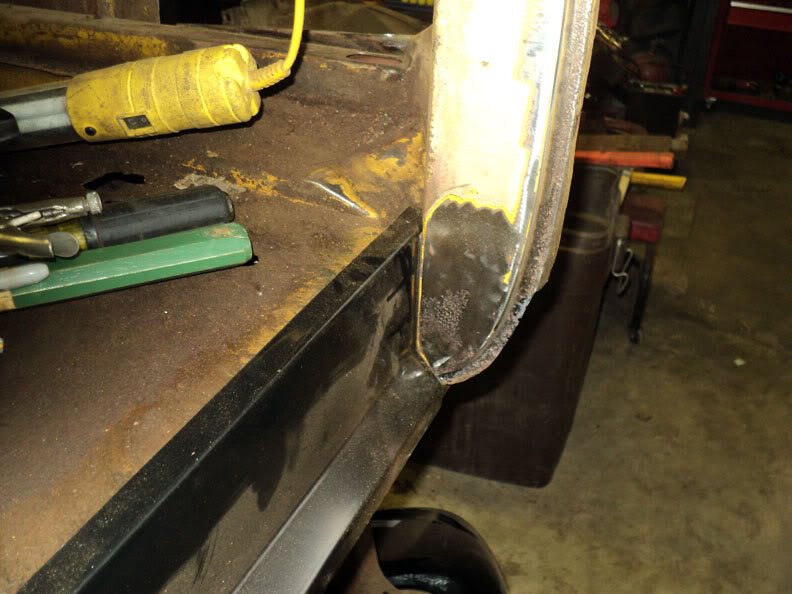
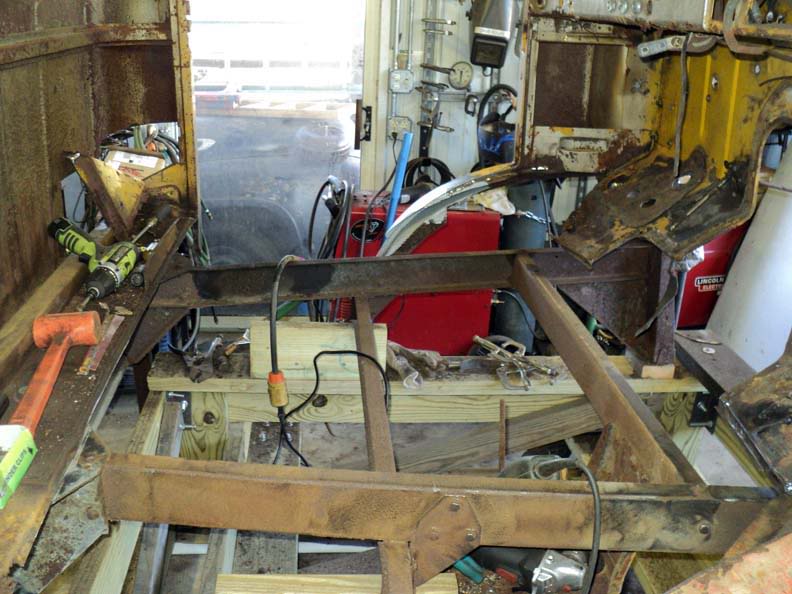
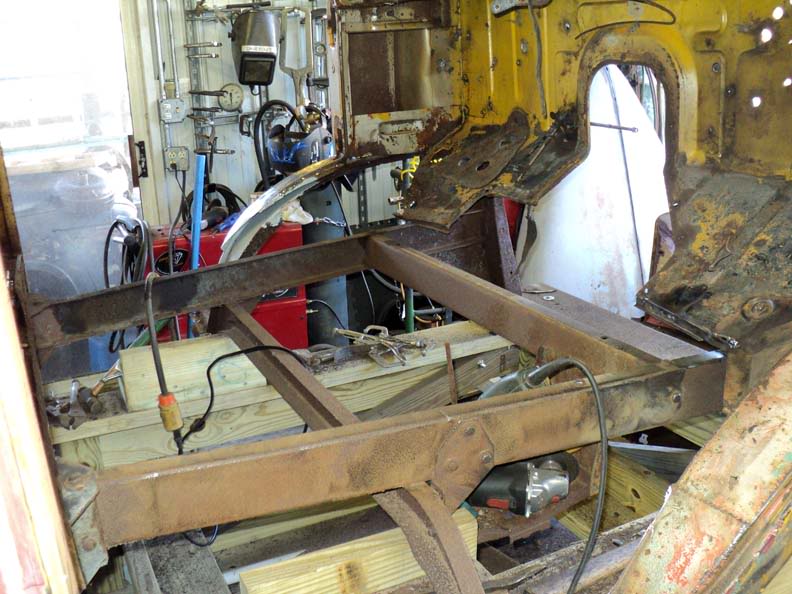
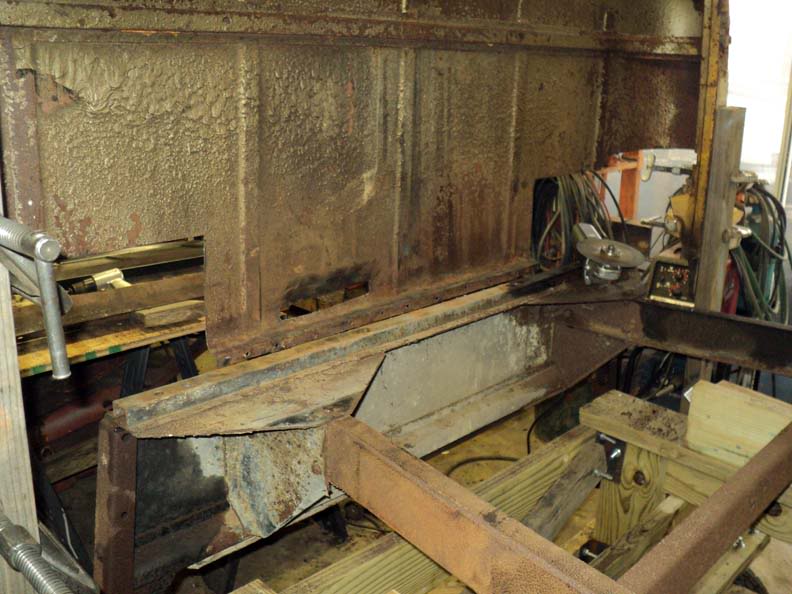
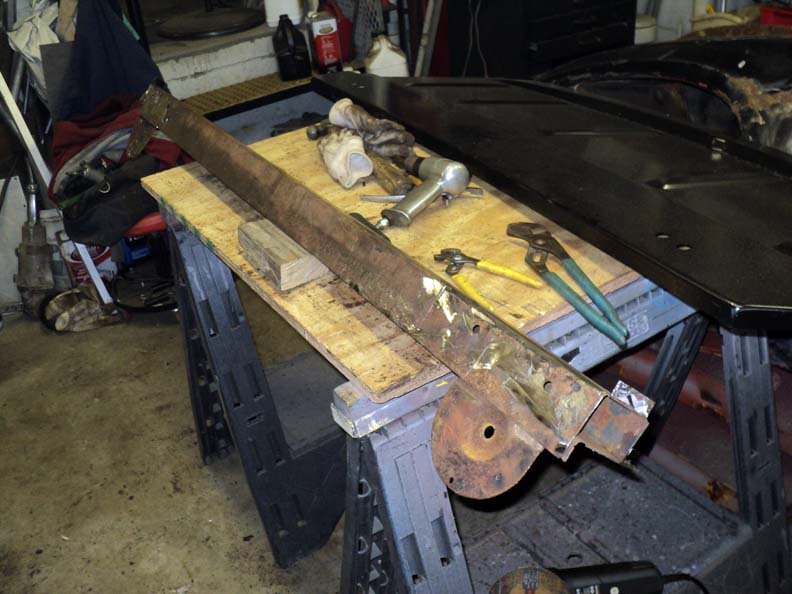
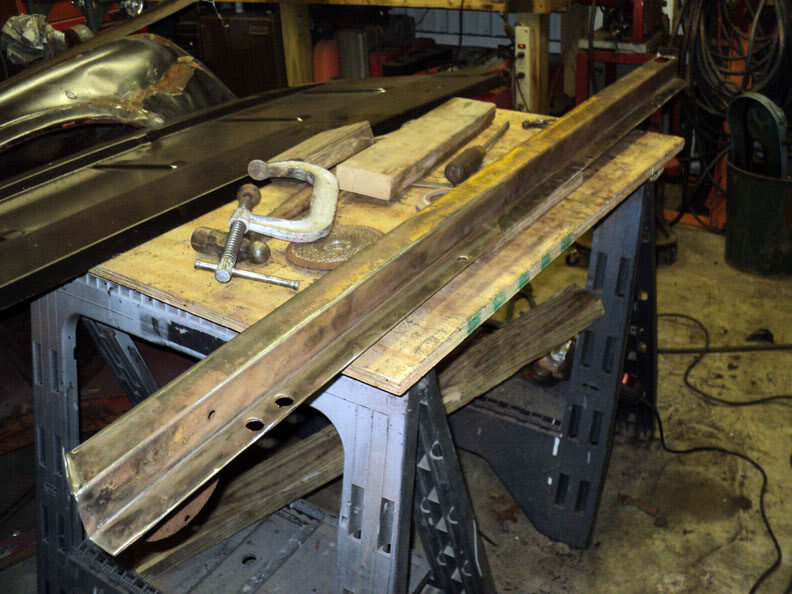
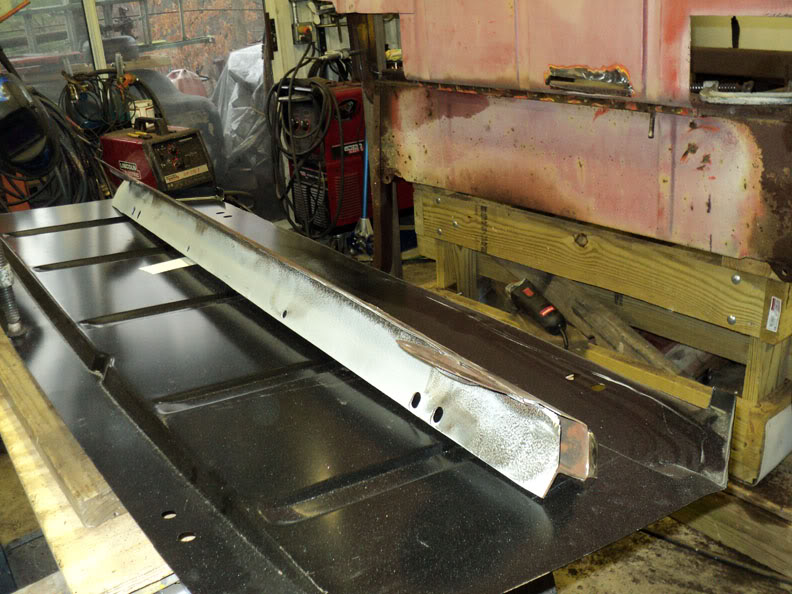
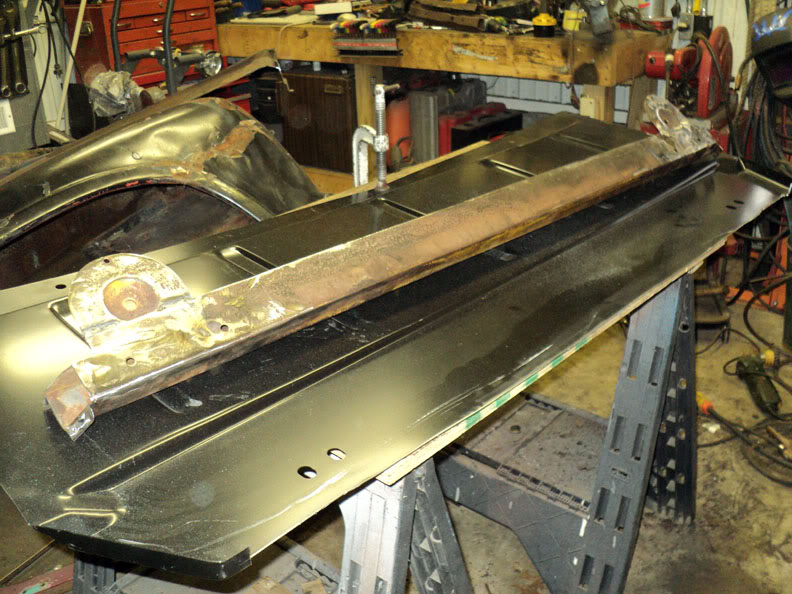
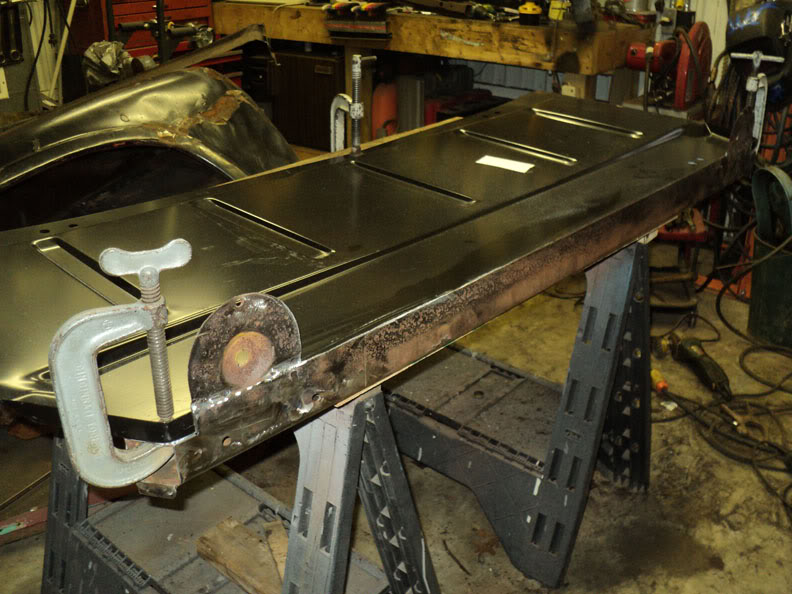
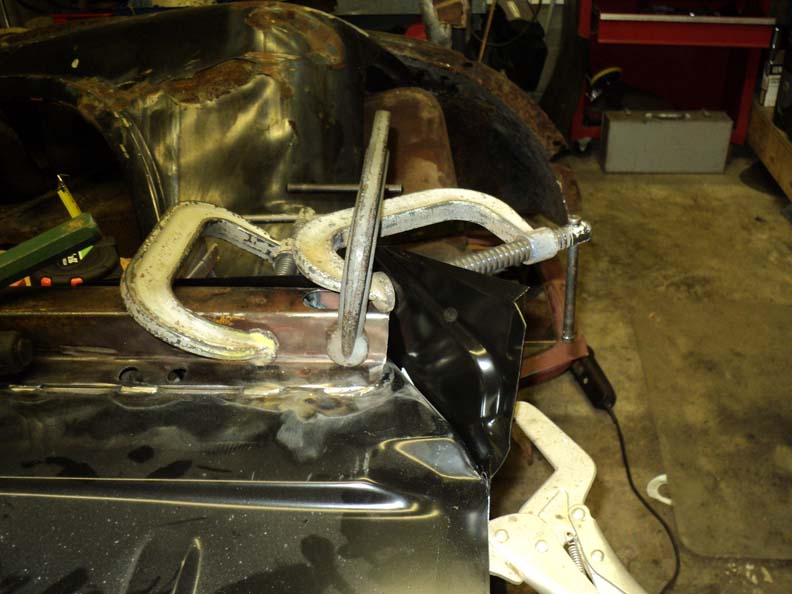
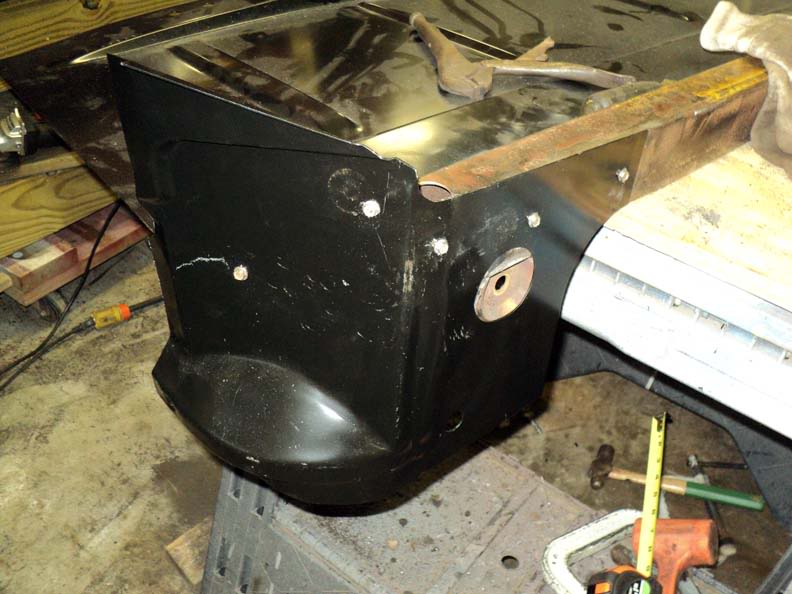
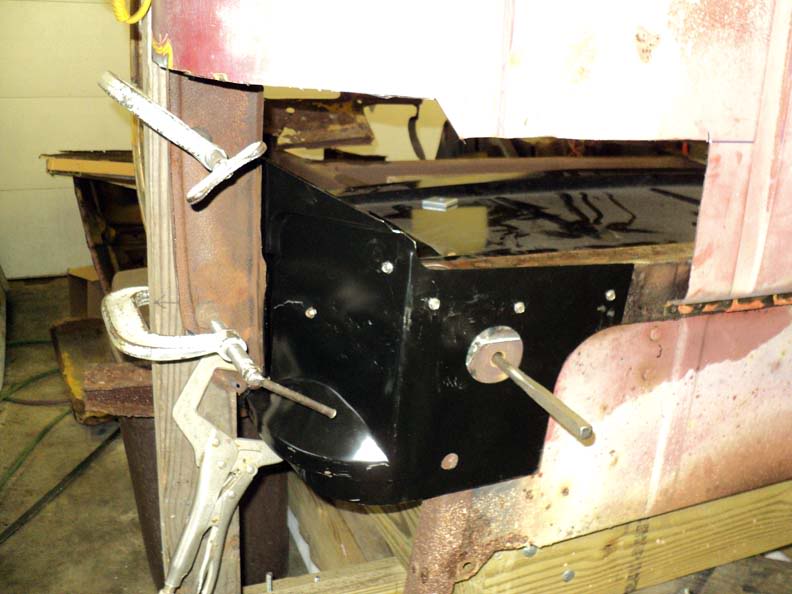
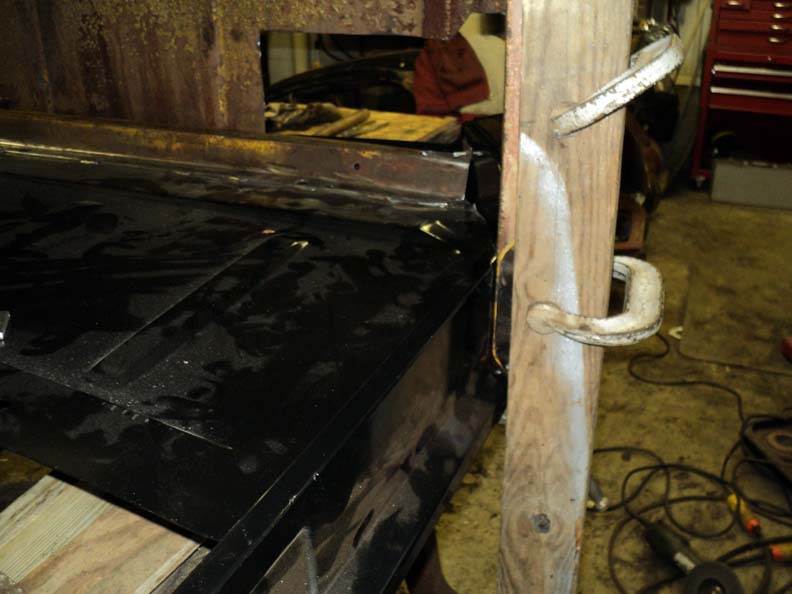
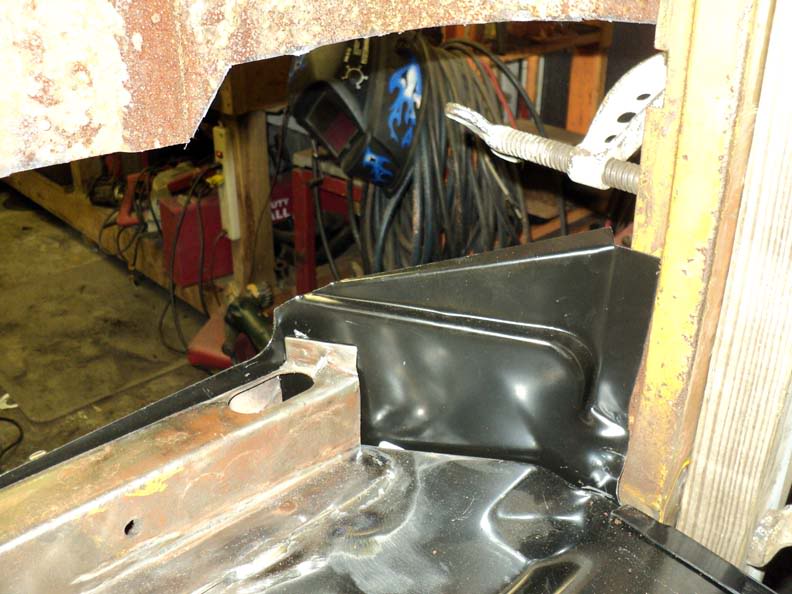
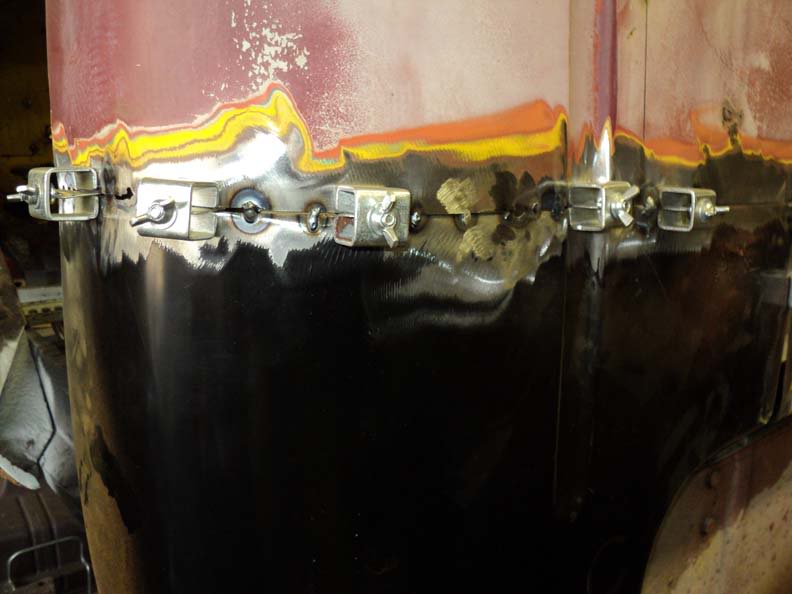
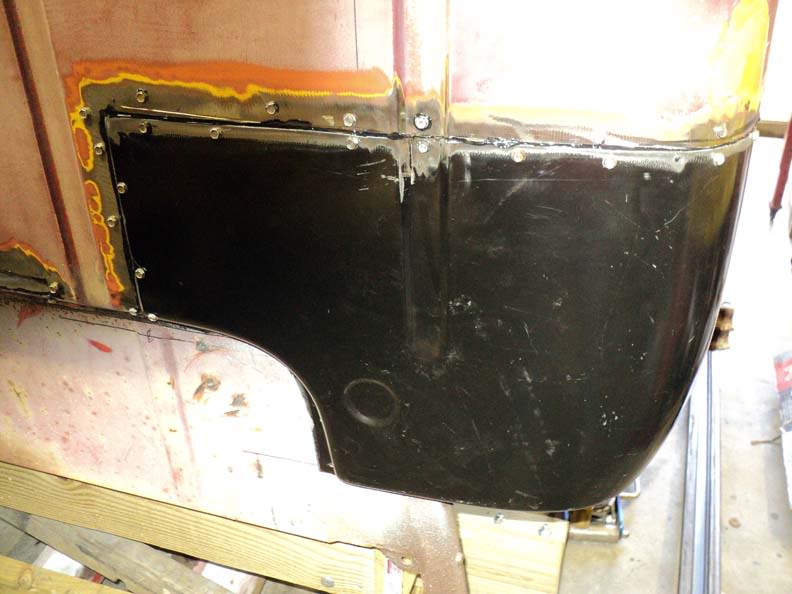
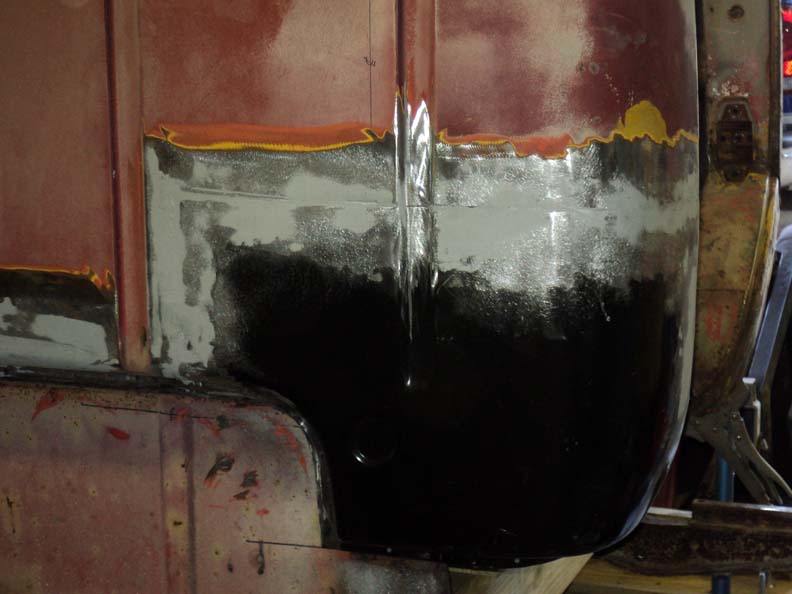
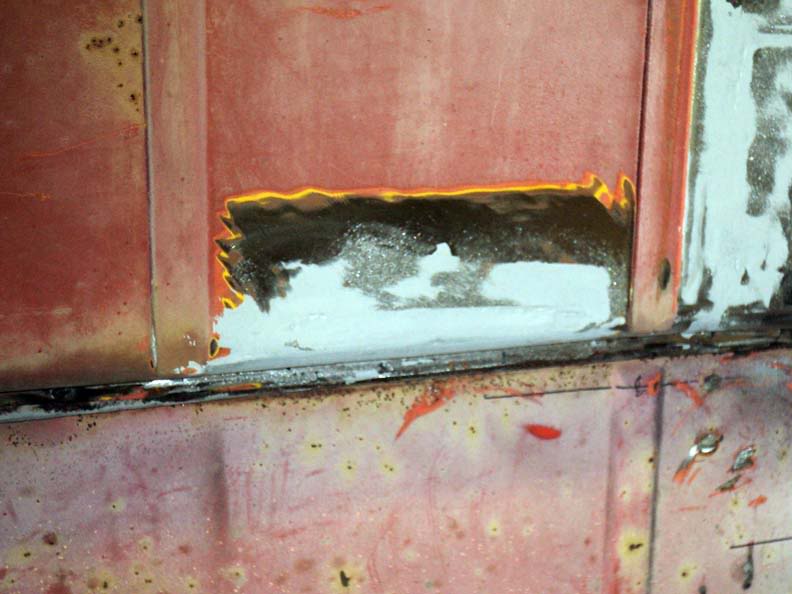
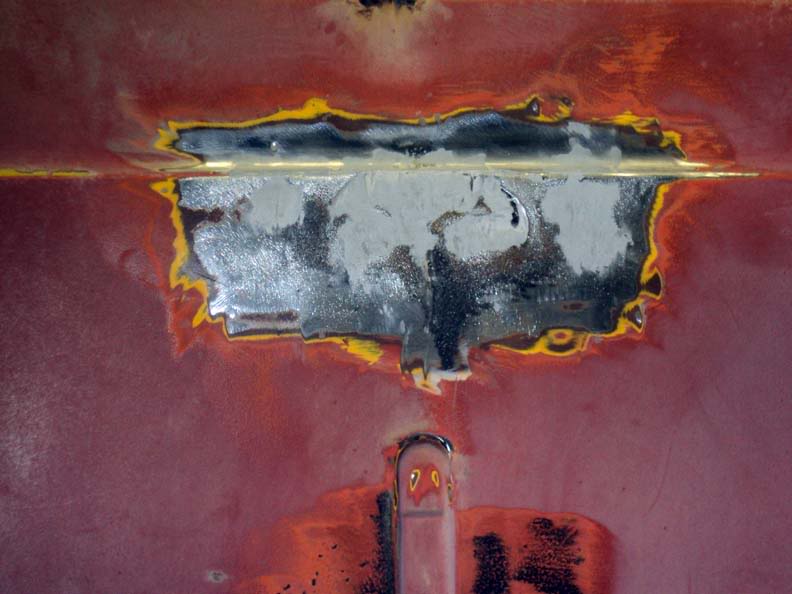
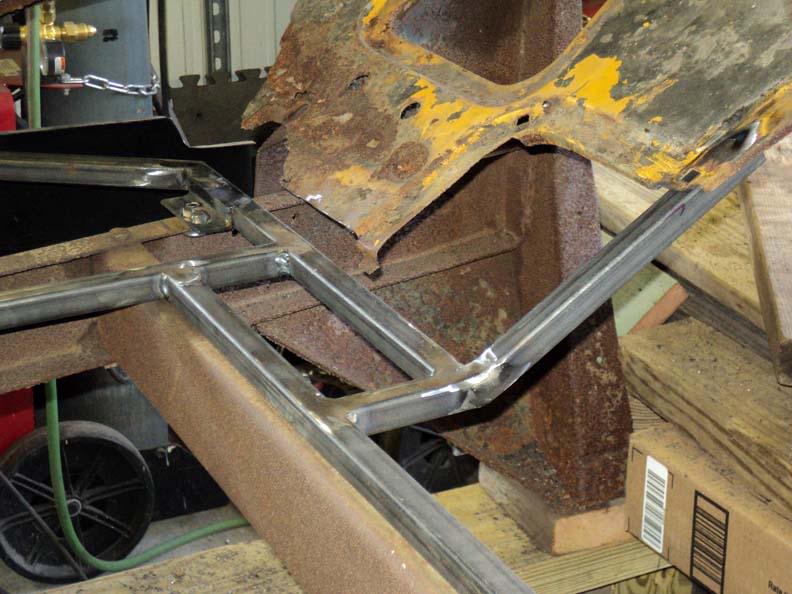
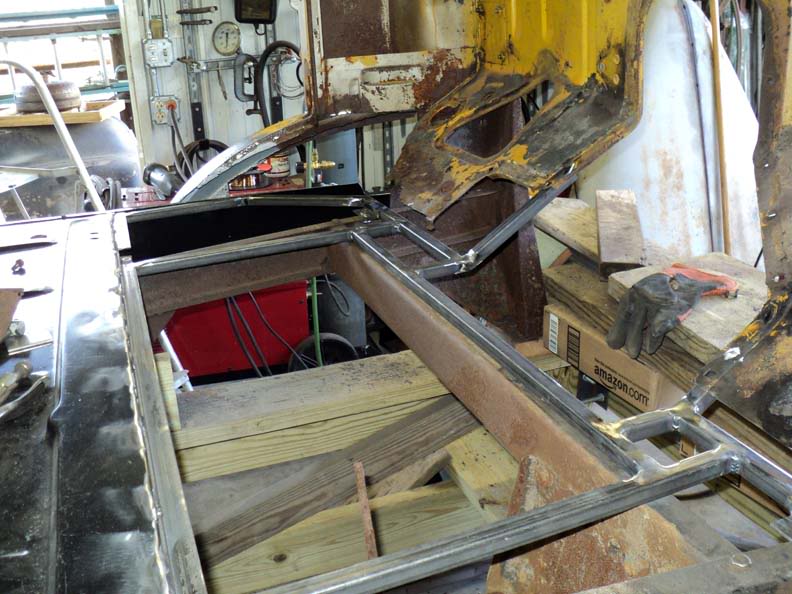
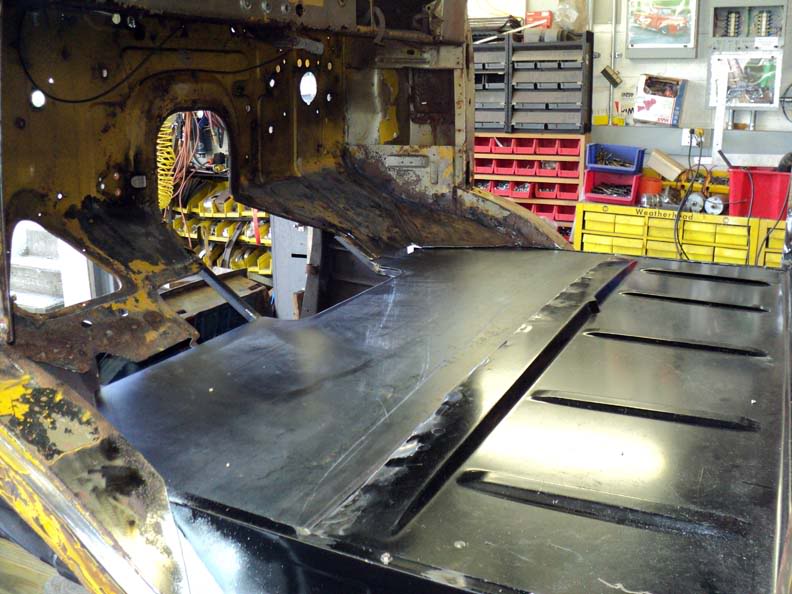
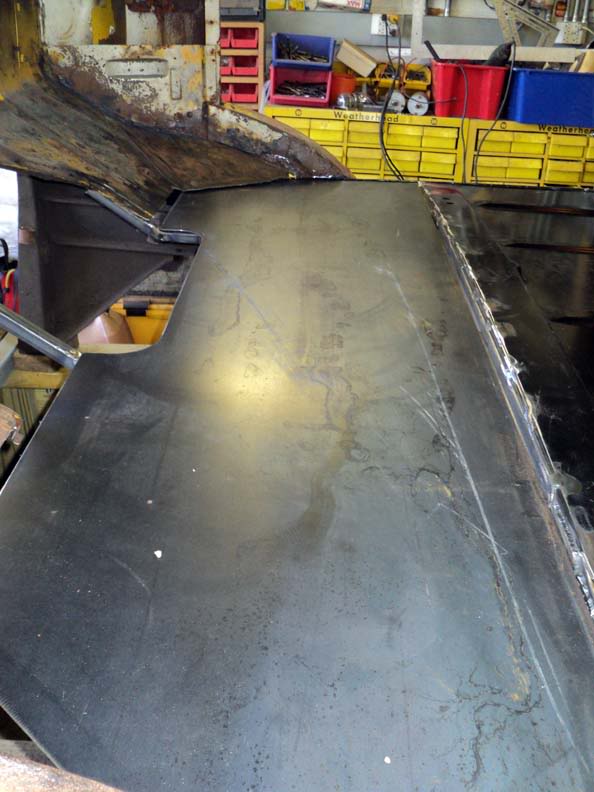
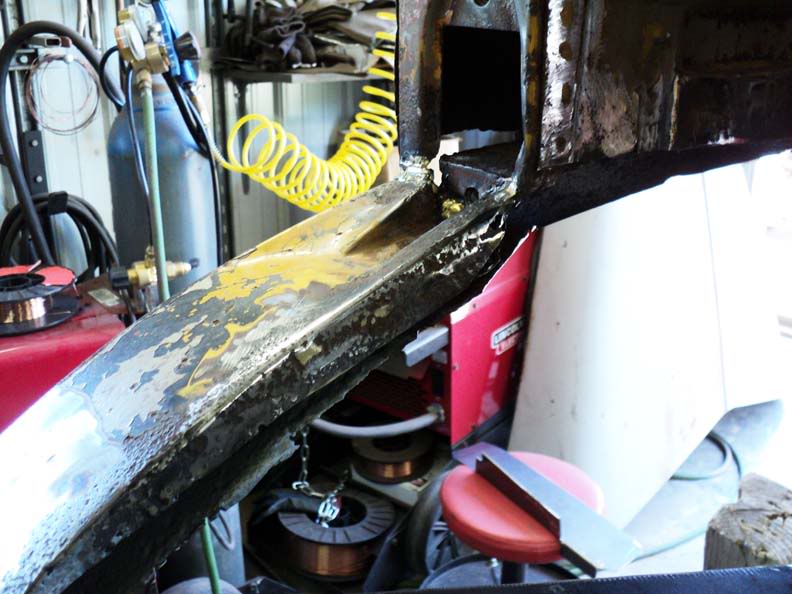
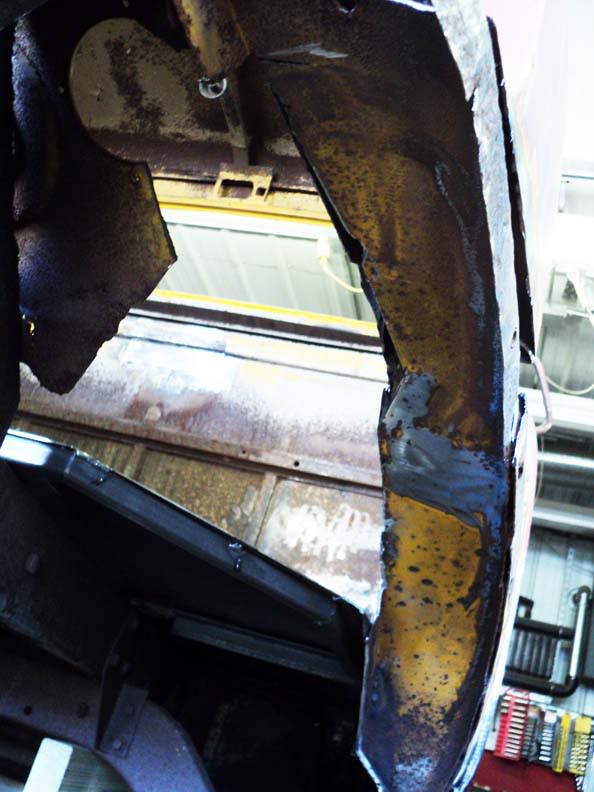
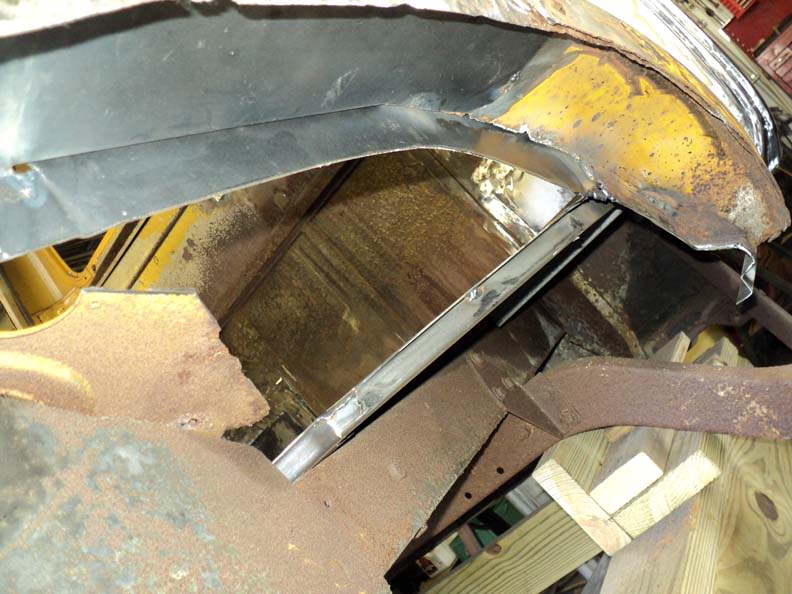
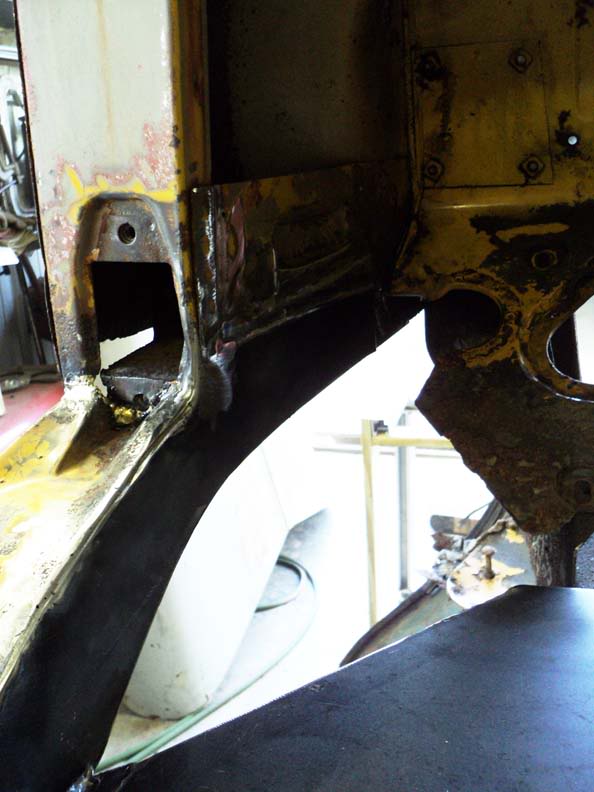
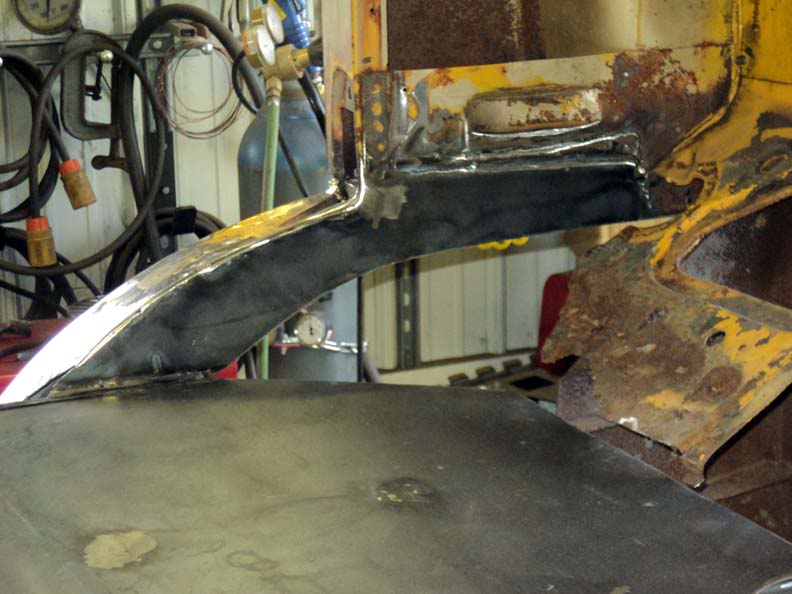
    Last night before going to bed I went down to the shop and took one last look of the day at what I had accomplished for the past several days. I was pondering over ideas that were going through my mind during the day while I was stripping this thing down. Not only was I constantly deciding what I would need to do to correct the problems I was uncovering but also I was thinking about what directions I want to go in with this project. I have long since learned that since my projects are stretched out over a period of several years, I tend to have lots of time to consider new ideas that pop up as well as acquisitions that I had no idea I would acquire when I start a project. My '53 pickup project,

    https://darksidersrealm.forumotion.com/t204-first-53-build-thread

    is a good example of this. It has changed directions several times and I've no doubt that it will again. So, I see no reason why this project won't go the same way. My original idea for this project was to build a bobtail toter by sitting this cab on a later model diesel chassis. However, now I keep seeing all these slant back car haulers and they are also pretty cool. I am also considering lots of ideas considering the interior. There are so many possibilities that I am hesitant to paint myself into a corner that I may soon regret. I guess it's a matter of procrastination VS snap decisions. I'm constantly trying to find a balance between the two extremes. People say I'm wishy-washy... Not true, sometimes I'm wishy and some times I'm washy.

    I don't often follow suggestions verbatim but I do consider all of them and take parts of them as a way to go in many cases. So, don't be afraid to suggest things to me or ask questions.

    Later Folks...
    Darkside Dave
    Darkside Dave
    Admin


    Posts : 1018
    Join date : 2009-04-21
    Age : 79
    Location : Marietta, Ohio

    Another COE project... - Page 2 Empty Spend, Spend, Spend...

    Post  Darkside Dave Sat Feb 11, 2012 12:03 am


    Hi Folks,
    I just ordered rocker panels and cab corners from Dennis Carpenter. That was a quick way to blow $200.00. So, let's see, so far it's like this. $500.00 for the COE cab, $500.00 for two good doors from AZ, plus $200.00 for the shipping, about $90.00 for the platform and the big caster wheels, $50.00 in fuel to bring the cab home plus the $200.00 I just spent. Now I'm up to $1,440.00 and all I have to show for it is this pile of rust in the shop. I must be insane. On top of all this I can think of another $800.00 that needs to be spent on it just to get the cab in primer and ready to paint. Since there are no COE cab specific parts being produced as there are for the conventional cab, with exception of cab corners and a few parts that normally aren't subject to the rust bugs. The rest of the sheet metal I have to fabricate and that isn't all. I also have to restore parts of the front fenders and make all the side steps from scratch. I can see three grand going into just the cab. What was I thinking???

    Later Folks...


    Darkside Dave
    Darkside Dave
    Darkside Dave
    Admin


    Posts : 1018
    Join date : 2009-04-21
    Age : 79
    Location : Marietta, Ohio

    Another COE project... - Page 2 Empty Polishing a turd...

    Post  Darkside Dave Tue Feb 14, 2012 9:43 pm


    Hi Folks...
    The COE had a decent windshield except for three scratch trails from broken wiper blades. I had heard that you could get polishing kits that would enable you to polish out the scratches. I checked around online and Eastwood had a kit for about $50.00. I thought it would be worth a shot. I went for it. Saturday I spent four hours polishing out the scratch. It's a messy tiring process even with a good air driven light weight polisher. However, I did manage to make the windshield look a lot better. If you really look hard you can find slight traces of the scratch tracks but I think it is good enough for me to use the windshield. So, I figure I saved $200.00. I thought leaving the glass in the cab was a good place for doing the polishing work. I'm going to remove it and wrap it in padding and store it with the other windshield I have for my '53 F-100. I took out the back glass but I don't think it's good enough to use. I do have another one from the '53 that is better and I will probably end up putting a back slider in it. Below are two pictures of the windshield after polishing it. It's kind of hard to tell how good it looks because of reflections inside the shop.

    Another COE project... - Page 2 Windshield1


    Another COE project... - Page 2 Windshield2
    Later Folks...


    Darkside Dave


    Darkside Dave
    Darkside Dave
    Admin


    Posts : 1018
    Join date : 2009-04-21
    Age : 79
    Location : Marietta, Ohio

    Another COE project... - Page 2 Empty Back at it...

    Post  Darkside Dave Sun Feb 19, 2012 11:29 am


    Hi Folks,
    If there was any one thing I could cite as a positive feature of this board, it would be the fact that the efforts of others that are featured here are inspiring.. This morning I was looking at the latest post of gasolinejunky on one of his two build threads. It was all I needed to get my lazy ass down to the shop and start making the first cut on the COE cab. It's not that I'm doing anything that radical or fantastic. The thing is that I'm actually making the first cut. In this case, the work of another member has inspired me to get with it and start some real work. So, later on after a make some serious headway I will be posting some progress shots.

    Later Folks...


    Darkside Dave
    Darkside Dave
    Darkside Dave
    Admin


    Posts : 1018
    Join date : 2009-04-21
    Age : 79
    Location : Marietta, Ohio

    Another COE project... - Page 2 Empty As promised...

    Post  Darkside Dave Sun Feb 19, 2012 11:13 pm


    Back Again...
    As I said in my earlier post today, I was going to go to the shop and cognomen with the mayhem of ripping and cutting into the COE cab. Well, I did just that and below are pictures of the evidence. I Bought conventional cab rockers because there are no COE cab specific parts available. In one picture there is one clamped in for fit. I think I can use them if I cut the short. The cab corners can be used because they are the same for either cab.

    Another COE project... - Page 2 RustCttter1

    Another COE project... - Page 2 RustCttter2

    Another COE project... - Page 2 RustCttter3

    Another COE project... - Page 2 RustCttter4

    Another COE project... - Page 2 RustCttter5
    Above is a piece I salvaged from another cab that was in pretty bad shape. I will cut it on the line and clean it up so I can weld it in in place of the rusted out one in this cab.

    Another COE project... - Page 2 RustCttter6

    Another COE project... - Page 2 RustCttter7

    Another COE project... - Page 2 RustCttter8

    Another COE project... - Page 2 RustCttter9

    Another COE project... - Page 2 RustCttter10

    Another COE project... - Page 2 RustCttter11

    I wanted to do some of this work before I order more parts. The back half of the cab floor is the same for either cab but I was not sure I was going to order one until today. $200.00 for a piece of 18 GA metal about 60"X 18". Due to the fact that I will be using this cab in a custom application I will have to fabricate my own design of front floor panels. If you look at the pictures you will notice the COIE cab has a substantial sub frame. This thing is a blessing in this case because it holds everything in place and eliminates the requirement for bracing in this case.

    This is just the beginning. I will be posting more progress pictures after I weld in some of the new metal. I have cut out for the cab corner replacement but I nee to wait until I get some of the inside metal fabricated and replaced.

    Later Folks...


    Darkside Dave
    Darkside Dave
    Darkside Dave
    Admin


    Posts : 1018
    Join date : 2009-04-21
    Age : 79
    Location : Marietta, Ohio

    Another COE project... - Page 2 Empty Oh my aching wallet...

    Post  Darkside Dave Mon Feb 20, 2012 12:54 pm


    Hi Folks,
    After yesterday's exploits I realized I had to go ahead and order the rear floor pan section and the inner rear cab corners, which BTW are about twice the price of the outer ones. So There went another $365.00. That brings me up to a total of about $1,800.00 and I haven't event started on the front clip. I didn't want to do this but it just came down to doing it this way or having this thing sit around for ever while I nickle and dime it a piece at a time. In reality there was no way to do this thing right without replacing all the parts that are commercially available. There still is so much that I am going to have to fabricate from scratch. I'm still going to have to find a hood and maybe one front fender. Something tells me I'll be lucky to get the cab completed for around three grand. Then there is still the rolling chassis and power train. I don't see getting out of this project for less than six to seven grand. That's pretty bad when you consider my other project which I am pretty sure is going to come in at about three grand. Of course that is due to a lot of buying and selling parts and donors connected to that project. BTW, that seven grand price was just to get the basic running vehicle together. I think it will cost another two to three grand to totally complete with all the trim and bling that usually comes into play with these things. I think I'm going to have to take on a night job to go along with my other part time gigs. It's a good thing I have some more work coming in to the shop when the weather gets better. I do a lot of that stuff outside during the good weather. So, I need to get this thing up to the point where I can roll it out to my storage building for a while and do some paying work.
    Later Folks...


    Darkside Dave


    Last edited by Darkside Dave on Mon Mar 05, 2012 3:37 pm; edited 2 times in total
    tomget
    tomget


    Posts : 144
    Join date : 2009-06-13
    Location : California

    Another COE project... - Page 2 Empty Re: Another COE project...

    Post  tomget Mon Feb 20, 2012 2:53 pm

    wow you sure keep busy. I'm juggling projects too. Rebuilt the 48F1 steering box last month and replaced the tie rod ends this weekend. The steering was good after rebuilding the box and now a even moreso with the pasenger side tie rod end having been bad. But as long as I was there I replaced both tie rod ends.

    Had to replace the one wire 60Amp alternator on my 58F100 last month. It sure didn't last long:). Those things can be kinda tempermental i guess. But they don't cost much. That's the good part.

    Weather is getting often spring-like around here and been driving the trucks more.. Although continued gas price hikes are continuing to make the trips shorter and less often. $$ Infrequent but still fun, or maybe even more fun.

    My spring/summer/fall part time job will start up again soon--probably Mayish--Looking forward to some cash.
    Darkside Dave
    Darkside Dave
    Admin


    Posts : 1018
    Join date : 2009-04-21
    Age : 79
    Location : Marietta, Ohio

    Another COE project... - Page 2 Empty Re: Another COE project...

    Post  Darkside Dave Mon Feb 20, 2012 9:57 pm


    Thanks Tom,
    lets hope I can keep things rolling at the current pace. If all goes as planned my doors from Phoenix should be here tomorrow. I expect the stuff From Mid Fifties to be here possibly by Friday. It would be great if they are her by then because I can start on putting this thing back together. The sooner it's back together, the sooner I can send it off to be blasted.
    Later Man...


    Darkside Dave
    Darkside Dave
    Darkside Dave
    Admin


    Posts : 1018
    Join date : 2009-04-21
    Age : 79
    Location : Marietta, Ohio

    Another COE project... - Page 2 Empty A floor gone conclusion...

    Post  Darkside Dave Sun Feb 26, 2012 9:54 pm


    Hi Folks,
    Yesterday I took the day off from the shop to go to Columbus to go to the Ohio state vehicle auction. They had an Econoline E-350 chassis based small bus listed. I thought this might be a suitable chassis base for my COE cab. Unfortunately it went for way more than I would have paid for it and it had the wrong engine anyway. However, it was an interesting experience to say the least.

    So, today I'm back at the COE project and I have taken it just about as far as I can go until the parts I have ordered get here from AZ. Below are two pictures showing the work I did today removing as much of the rusted out floor pans I could. Normally with a conventional cab I could never do this without a bunch of bracing welded in to keep the cab shape right. However, the COE cab has the sub frame under it that keeps everything in place when you cut out the floor and rockers. That is why I didn't take the cab off the sub frame. I'll do that when I get the cab all put back together. Fortunately the sub frame is made of heavy gauge metal and had enough grease on it to prevent any real damage from rust. It just needs blasted and painted with POR-15. So now I wait for parts to arrive.. I have also found a really nice hood out in California I bought and it should be shipped by truck freight this week. I'll be posting pictures when it gets here. Below are two pictures of the results of today's work.

    Another COE project... - Page 2 FloorGone2

    Another COE project... - Page 2 FloorGone1
    Later Folks...


    Darkside Dave
    Darkside Dave
    Darkside Dave
    Admin


    Posts : 1018
    Join date : 2009-04-21
    Age : 79
    Location : Marietta, Ohio

    Another COE project... - Page 2 Empty Back to business...

    Post  Darkside Dave Tue Feb 28, 2012 10:39 pm


    Hi Folks,
    After all the problems with the board and and going to the Ohio state vehicle auction, I finally got back on the COE project for a few hours this afternoon. I had to go up to the auction place this morning to pick up the snow plow I bid on for my friend but I made it back in time for some serious work. I also got a delivery from the guy with the brown truck. It was the other parts I ordered. Now I can finish cutting out the old stuff that I know exactly what I need to leave. Tomorrow should make some serious progress and maybe there will be more pictures.

    Later Folks...


    Darkside Dave
    Darkside Dave
    Darkside Dave
    Admin


    Posts : 1018
    Join date : 2009-04-21
    Age : 79
    Location : Marietta, Ohio

    Another COE project... - Page 2 Empty Back to work...

    Post  Darkside Dave Wed Feb 29, 2012 10:20 pm


    Hi Folks,
    I finally got back on the project today. I stripped down the rear cross member today and started to put the new stuff together. It was welded to the rear floor section. I had to cut out the old floor and welds and then weld on the new section and then start positioning the inside corners. Toward the end of the workday I positioned the floor and cross member in the cab to see how the left inside cab corner lines up. I temporarily fastened it on with self drilling screws. If everything lines up OK I will weld the inside corner on and take out the screws and then weld closed the screw holes. Below is a series of pictures I took today as the work progressed.

    Later Folks...


    Another COE project... - Page 2 CabFloor1


    Another COE project... - Page 2 CabFloor2


    Another COE project... - Page 2 CabFloor3


    Another COE project... - Page 2 CabFloor4


    Another COE project... - Page 2 CabFloor5


    Another COE project... - Page 2 CabFloor6


    Another COE project... - Page 2 CabFloor7


    Another COE project... - Page 2 CabFloor8


    Another COE project... - Page 2 CabFloor9


    Another COE project... - Page 2 CabFloor10


    Another COE project... - Page 2 CabFloor11


    Another COE project... - Page 2 CabFloor12


    Another COE project... - Page 2 CabFloor13


    Another COE project... - Page 2 CabFloor14


    Darkside Dave
    Darkside Dave
    Darkside Dave
    Admin


    Posts : 1018
    Join date : 2009-04-21
    Age : 79
    Location : Marietta, Ohio

    Another COE project... - Page 2 Empty Back at it again...

    Post  Darkside Dave Sun Mar 11, 2012 9:27 pm


    Hi Folks,
    I haven't posted any progress for several days now but I have made a little headway since my last posting. Last week I put on the left rear outside cab corner. Unfortunately my plan for welding in the corner section was probably not a good idea considering the existing metal in the cab did not weld well at all there were repeated blowouts no mater how low I set the MIG. I finally had to put a back piece in jut to get it welded in and it is going to be a real pain in the ass to make it look decent.. I plan on using all metal filler to bring it to a level point and then go with regular filler. I still see a lot of grinding and sanding in my future on this corner.

    Another COE project... - Page 2 WeldCorner01


    Another COE project... - Page 2 WeldCorner02

    I discussed this situation with a friend in the business and he asked if I have ever tried 3M 8115 epoxy panel adhesive as an alternative to welding. I said that considering my problems with the welding I was open to giving it a try. Well, today was my first experience with the stuff. I bought one cartridge that comes with two mixer tips. My friend had the dual plunger gun so I didn't need to shell out 150 bucks for that thing. Anyway, today I gave the stuff a try. It was my first time but I think maybe I have it figured out. O made a 2" wide back piece and first put it all together with self drilling sheet metal screws. Then I took it all apsrt and re-assembled it using the epoxy adhesive. The screws will come out after the epoxy sets and then I'll fill those holes with all metal filler.


    Another COE project... - Page 2 EpoxyCorner01


    Another COE project... - Page 2 EpoxyCorner02
    There was also a place in the area under the rear window that was cracked from fatigue where they had some sort of bracket mounted there for something. I made a back piece for it and used epoxy to back it up with temporary screws like I did the corner.


    Another COE project... - Page 2 EpoxyPanel01


    Another COE project... - Page 2 EpoxyPanel02

    OK that is where I am so far. Now onto other news. I got the hood from California on Friday. It made it here by truck freight and it is in great shape. Now I need to find some nice front fenders or at least one for the right side. I can use what I have but it will take a lot of work to make it right.

    Later Folks...


    Darkside Dave


    Duke55
    Duke55


    Posts : 36
    Join date : 2011-05-03
    Age : 44
    Location : Utah

    Another COE project... - Page 2 Empty Re: Another COE project...

    Post  Duke55 Mon Mar 12, 2012 10:18 pm


    Dave,

    Do you know if you can sand/shape the epoxy squeeze-out and then topcoat with primer or do you have to topcoat with some other filler prior to priming? I have contemplated on bonding the tonneau cover sheet to the frame with epoxy on my project but I am not sure I can get the corner fillet they way I want it were the edge of the sheet metal meets the tonneau cover frame. Because of this I have been planning on welding it on solid and then grinding the corners down to create the fillet I want.
    Darkside Dave
    Darkside Dave
    Admin


    Posts : 1018
    Join date : 2009-04-21
    Age : 79
    Location : Marietta, Ohio

    Another COE project... - Page 2 Empty Re: Another COE project...

    Post  Darkside Dave Mon Mar 12, 2012 11:09 pm


    As of now I have not tried but I should have an answer and maybe some pictures this Sunday. As of right now that stuff is pretty damn hard so I suspect you can work it. It may end up being micro porous and in that case would require a thin filler coat. All my base filler coats are going to be All Metal filler.

    Later Man...


    Darkside Dave
    Duke55
    Duke55


    Posts : 36
    Join date : 2011-05-03
    Age : 44
    Location : Utah

    Another COE project... - Page 2 Empty Re: Another COE project...

    Post  Duke55 Tue Mar 13, 2012 8:01 pm

    Have you ever used USC duraglas fiberglass filled filler? It is what I use when I need something heavy duty. I have never used all-metal but I also haven't heard anything good about it.
    Darkside Dave
    Darkside Dave
    Admin


    Posts : 1018
    Join date : 2009-04-21
    Age : 79
    Location : Marietta, Ohio

    Another COE project... - Page 2 Empty Re: Another COE project...

    Post  Darkside Dave Tue Mar 13, 2012 9:19 pm


    No But My neighbor has tried the USC stuff. He seemed to like it. As I understand, there are two varieties of it, one course for deep filling and another finer grade for finish work. I have been a fan of the All Metal stuff since back in the late 60s. It works well in seams and does not crack out if you prep it right. As with any filler, surface prep is everything. I have even seen it drilled and tapped for screws. Originally the stuff was called Alumalead. Downside it that it costs a lot more. It's about $30.00 a quart. I only use it a base and then go with standard 3M filler for the finish coat. Personally I like the all Metal stuff but some folks don't. It works a bit different than the regular filler. But then again, I'm not building show trucks. I intend to use these things and most of the time a 20 footer is good enough for me. With me it's a matter of structure, strength and utility over appearance. That's not to say I don't appreciate a great looking job.

    BTW, I did sand down some of the panel bond adhesive and it appears to work well. Looks as good as any filler. Here again though, it's high dollar stuff.

    Later Man...


    Darkside Dave
    Darkside Dave
    Darkside Dave
    Admin


    Posts : 1018
    Join date : 2009-04-21
    Age : 79
    Location : Marietta, Ohio

    Another COE project... - Page 2 Empty A bit more done...

    Post  Darkside Dave Thu Mar 15, 2012 3:49 pm


    Hi Folks,
    I finally managed to get the cab corners in with the first rough filler using the USC All Metal filler I also have repaired a rusted out area at the bottom center and a place in the center right under the rear window. At some time in the life of this truck there was some kind of thing attached there that eventually caused stress cracks. I backed up these places with new 18 GA. steel and 3M automotive panel adhesive. The stuff is expensive but it works great. The first level of filler is primarily for strength and will not crack out later. I intend to send the cab out to a local outfit here that does all sorts of media blasting after I get all the repair and welding done on the basic cab. then it will come back here and I do the finish work on the exterior and by then I should know what I want to do with the interior so far as floor dash and console is concerned.


    Another COE project... - Page 2 RCfirstFill01
    ABOVE: Right side cab corner. This one was welded and it was a real pain.


    Another COE project... - Page 2 LCfirstFill01
    ABOVE: Left side cab corner. Here I used the 3M panel adhesive and it worked much better.


    Another COE project... - Page 2 CntrFirstFill01
    ABOVE: Here there was a rusted out place that was stuffed with rags and Bondo. I cut it out and backed it with a new piece of 18 GA. metal and used the 3M adhesive


    Another COE project... - Page 2 TopCntrFirstFill01
    ABOVE: Here is a picture of the place up under the rear window. I backed it with a formed piece out of another old cab using th 3M adhesive.

    Another COE project... - Page 2 CabBackFirstFill01
    ABOVE: Here is a picture of the entire back of the cab

    Soon I will be at a point where I need to make a decision about the front half of the floor and firewall. There are no ready made panels available for that part. The only reason I was able to get the back half is because it is the same as the conventional cab. The more I look at this thing I am starting to think a mid-engine set up is best. I can still make it a bob tail hauler and have plenty of room for the engine right behind the cab. It would be much easier to work on still leave all kinds of room up front for AC, heat, power brakes and steering, dual batteries and even some storage space. I have lots of room height wise so I could duct air flow from the radiator, AC condenser coil, oil coolers and inter cooler dopwn under the cab and back by the engine. I'm just about there on that decision. My only concern so far is a seriously short drive shaft.

    Now comes a point where hearing from others here on the board might help.

    Later Folks...


    Darkside Dave
    Darkside Dave
    Darkside Dave
    Admin


    Posts : 1018
    Join date : 2009-04-21
    Age : 79
    Location : Marietta, Ohio

    Another COE project... - Page 2 Empty ANOTHER VIDEO...

    Post  Darkside Dave Thu Mar 22, 2012 5:00 pm


    Hi Folks,
    Here is another video to bring you up to date on the progress so far.


    Darkside Dave


    Darkside Dave
    Darkside Dave
    Admin


    Posts : 1018
    Join date : 2009-04-21
    Age : 79
    Location : Marietta, Ohio

    Another COE project... - Page 2 Empty Re: Another COE project...

    Post  Darkside Dave Sun Apr 01, 2012 8:02 pm


    Hi Folks,
    I finally managed to get back to working on the COE cab. Yesterday was mainly plotting and planning but I did get a little start on the project by making one part. Today was mostly cutting and welding in a 3/4" square steel tube stock frame work for the front half of the floor section. Below are some pictures.


    Another COE project... - Page 2 FrntFloor01


    Another COE project... - Page 2 FrntFloor02


    Another COE project... - Page 2 FrntFloor03


    Another COE project... - Page 2 FrntFloor04


    Another COE project... - Page 2 FrntFloor05


    Another COE project... - Page 2 FrntFloor06

    I also have a short video.


    OK, that's all for now. I hope to get back on this on Wednesday.

    Later Folks...


    Darkside Dave
    Darkside Dave
    Darkside Dave
    Admin


    Posts : 1018
    Join date : 2009-04-21
    Age : 79
    Location : Marietta, Ohio

    Another COE project... - Page 2 Empty Re: Another COE project...

    Post  Darkside Dave Sat Apr 07, 2012 7:10 pm


    Hi Folks,
    Finally back working on the cab again... It's not really much to show for the time involved. I spent a lot of the time cutting out cardboard patterns and then transferring them to a sheet of 16 GA. steel and then cutting it to fit. I find that if I limit myself to doing just one part or piece per work session, I do a lot better work. I still have to cut and weld in two more ribs under the floor before I weld in this piece.


    Another COE project... - Page 2 FrntFloor11


    Another COE project... - Page 2 FrntFloor10


    Another COE project... - Page 2 FrntFloor09


    Another COE project... - Page 2 FrntFloor08


    Tomorrow I'll be going to town with the wife so not much will get done on the cab once again.

    Later...


    Darkside Dave

    evs1
    evs1


    Posts : 6
    Join date : 2012-02-17
    Age : 69
    Location : Lubeck, WV.

    Another COE project... - Page 2 Empty Re: Another COE project...

    Post  evs1 Mon Apr 09, 2012 6:34 pm

    Dave, I'd like to share with you some of the ideas I put together for my L-700 Dodge project before that fell through and it left town. I was going to use a school bus chassis, the kind with the flat nose and front engine. That would give me a 2.5 ton chassis, diesel power, allison automatic, power steering and brakes. The later models all have the Bud style rims instead of those darn Dayton split rims. Also the steering geometry is already located correctly for the column to line up. It has straight frame rails so the engine could be scooted to the rear to line up wherever you needed it. Same with the rear axle, just a matter of sliding it forward to where you need it, drill new bolt holes and cut off the excess chassis. My plan was to use a wrecker body without the hoist. I was going to use the kind that had the toolbox in the front of the bed and mount the engine at least partially under it. Access panels could be made in the top and sides, (inside the tool boxes), for engine maintenance. This would avoid having to tilt or remove the cab for major repairs. It all looked good in my head and on paper, but I never found out for sure.
    Maybe some of this info will help you or give you some ideas.

    Bill.
    Darkside Dave
    Darkside Dave
    Admin


    Posts : 1018
    Join date : 2009-04-21
    Age : 79
    Location : Marietta, Ohio

    Another COE project... - Page 2 Empty Re: Another COE project...

    Post  Darkside Dave Tue Apr 10, 2012 10:18 am


    Hi Bill,
    You bring up a lot of excellent points regarding the COE. I thought about a buss chassis and even went to look at the buss's the city of Parkersburg was auctioning off. I probably should have bid on one because they went for about $1,500.00 each. However, the chassis were actually too big for my needs and that just means more money for upkeep and repairs. I would like to find an E-450 buss chassis with the older 7.3 PS diesel. You are right about the straight frame being the best thing for moving back the engine. The issue regarding the steering column angle is no problem because I can always make that up with u-joints. However, I would also like to have four wheel drive and still have dual rear wheels. There are a lot of conflicting thoughts in regard to planning going through my mind. More than likely, I will end up doing something that I have yet to consider. However, I've got a ways to go before I have to actually do something about the chassis. Current plans call for getting the cab basically done as far as body and structural work is concerned, getting a coat of epoxy primer on it and then storing it while I get back on my '53 F-100, see https://darksidersrealm.forumotion.com/t204-first-53-build-thread for that one. It was started first and I would not have even started on this one if it had not been on the edge of not being savable. The thing was right to the point where another year or two outside would hve been too much for it. I don't mind doing it this way though because it gives me a lot of time to collect parts for the ones I'm not currently working on.

    Later Man...


    Darkside Dave

    Darkside Dave
    Darkside Dave
    Admin


    Posts : 1018
    Join date : 2009-04-21
    Age : 79
    Location : Marietta, Ohio

    Another COE project... - Page 2 Empty The worst part...

    Post  Darkside Dave Sat Apr 14, 2012 10:28 am


    Hi Folks,
    I finally got to get back on the project for a day. I worked until I ran out of shield gas and got this far. I started on what I consider to be the worst part of the cab which is the lower left front part of the cab and front floor section. There are no replacement parts for this section of the cab. Al you can get is the stuff that is the same as the conventional cabs. As you can see, all the stuf has rusted away or previously has been cut out and replaced by a hack job which was no good at all. I'm kind of flying by the seat of my pants on this one. I am trying as best I can to duplicate in a reverse image the right side but there are still differences. It still looks pretty rough but first I'm going for structural integrity and then cosmetics. Below are the latest pictures.


    Another COE project... - Page 2 RtFrnt02


    Another COE project... - Page 2 RtFrnt03


    Another COE project... - Page 2 RtFrnt01


    Another COE project... - Page 2 RtFrnt04


    Another COE project... - Page 2 RtFrnt06


    Another COE project... - Page 2 RtFrontPart01


    Another COE project... - Page 2 RtFrnt04


    Another COE project... - Page 2 RtFrnt10


    Since I am going to roll the cab over on it's back later to do all the welding on the underside I decided to just tack the underside for now. The problem with welding the underside now is that the sub frame that is holding everything in place is in the way. When all the work topside is done I can remove the cab from the sub frame. Next I plan on getting the rest of the left front floor and lower firewall in. I'm doing away with the through the floor pedals and going to firewall mounted swing pedals. I don't need all the holes and removable floor sections.

    Later Folks...


    Darkside Dave

    Sponsored content


    Another COE project... - Page 2 Empty Re: Another COE project...

    Post  Sponsored content


      Current date/time is Sun May 12, 2024 9:31 pm